
Introduction
Buying a school ERP is only the first half of the project. The second half is getting it into everyday use without creating more work than the old process.
That is where implementation matters.
A school can choose capable software and still struggle if student data is messy, responsibilities are unclear, teachers are trained too early or too late, or the old and new systems continue running side by side for months. The result is usually duplicate work: one record in the ERP, another in Excel, and a third in a register “just in case.”
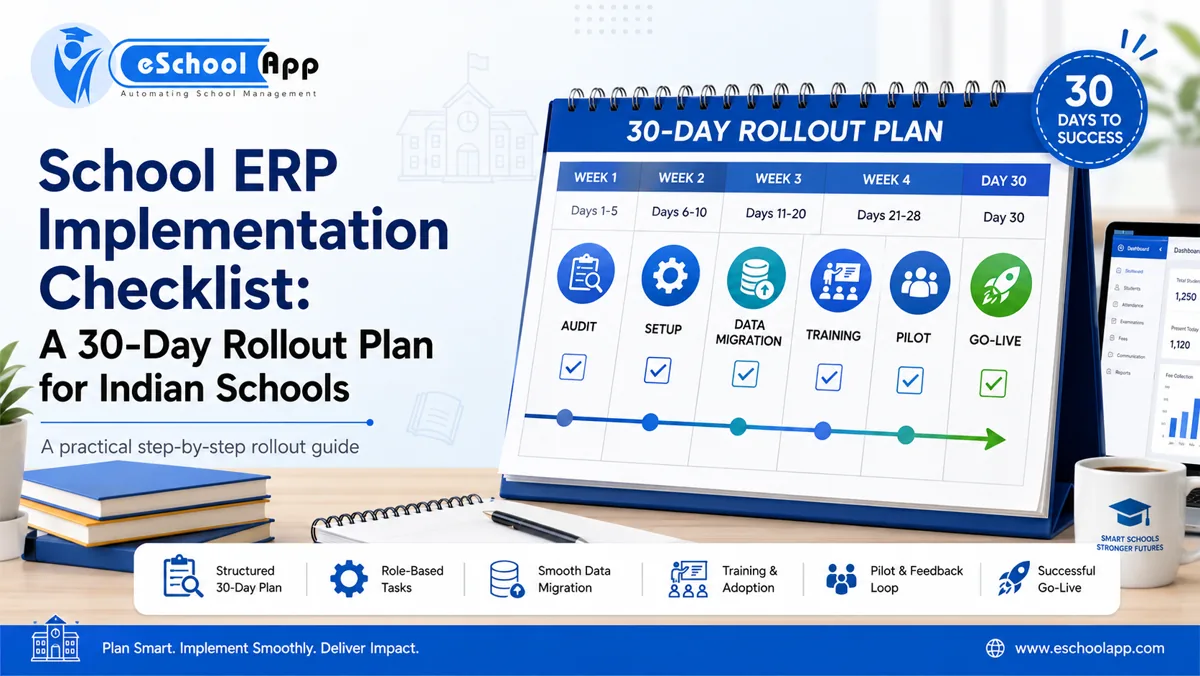
A better approach is to treat school ERP implementation as a short operational project with clear owners, dates and acceptance checks.
This 30-day rollout plan is designed for Indian schools, but the same structure works for most schools worldwide. It does not assume that every module must go live on day one. In fact, the safer approach is usually to activate the highest-value workflows first and expand after users are comfortable.
On this page
- Before Day 1: Decide What Success Means
- Days 1-5: Audit Processes, Owners and Data
- Days 6-12: Configure the ERP Around Real School Work
- Days 13-18: Clean, Map and Migrate Data
- Days 19-24: Train Users by Role, Not by Feature
- Days 25-27: Run a Controlled Pilot
- Days 28-30: Go Live and Stabilize
- What Should You Measure After Go-Live?
- How eSchoolApp Fits This Rollout Approach
- Frequently Asked Questions
- Final Thoughts
Before Day 1: Decide What Success Means
Do not begin with configuration. Begin with outcomes.
A school should be able to explain why it is implementing the ERP in one or two sentences. Examples might include reducing manual fee follow-up, replacing paper attendance, creating one reliable student record, improving parent communication, or getting management reports without waiting for several departments to prepare them.
Create a simple baseline before the project starts. Record how long key tasks take today, how many spreadsheets are used, how many people touch the same data, and where mistakes usually occur. This baseline becomes useful later when management wants to know whether the ERP is actually creating value.
Also appoint an internal project owner. The vendor can configure the platform, but the school must still decide processes, confirm data and drive adoption. A principal, administrator, operations head or senior coordinator should own the rollout from the school side.
Days 1-5: Audit Processes, Owners and Data
The first five days are for discovery, not rushing into data entry.
List the processes that will move into the ERP first. For most schools these include some combination of student information, attendance, fees, admissions, examinations, communication and staff records.
For each process, write down:
- Who owns it today?
- Where is the current data stored?
- Which fields are mandatory?
- Which reports depend on it?
- Which other departments use the same information?
- What should happen automatically after an action is completed?
This is also the right time to identify duplicate records and inconsistent formats. A student’s name may be written one way in the admission file and another way in the fee register. Parent mobile numbers may be outdated. Staff designations may be inconsistent. Migrating poor-quality data only makes poor-quality data easier to access.
For Indian schools, record preservation requirements also matter. CBSE-affiliated schools, for example, are required under the Affiliation Bye-Laws to maintain specified admission, attendance, examination, staff, financial and annual return records. Your ERP rollout should never become an excuse to delete required records without checking the applicable rule.
Days 6-12: Configure the ERP Around Real School Work
Now configure the system around the school’s actual workflows.
Set up classes, sections, academic year, fee structures, attendance rules, user roles, communication templates, transport routes and other selected modules. Avoid unnecessary customization during the first week. Every custom rule adds testing and maintenance work, so use standard workflows where they genuinely fit.
The most useful configuration test is not “Does this module open?” It is “Can a user complete the full task?”
For example, test a fee workflow from fee assignment to payment, receipt and outstanding balance. Test attendance from teacher marking to the parent alert and management report. Test admissions from enquiry to enrolled student.
If your ERP connects to payment gateways, WhatsApp/SMS, biometric/RFID devices or GPS trackers, test those integrations now rather than leaving them for launch day.
Days 13-18: Clean, Map and Migrate Data
Data migration should be controlled, repeatable and verified.
Start by deciding which information must move. Current students and staff are obvious, but historical marks, past payments, previous attendance, documents and former students may need different treatment. Some data can remain in a read-only archive instead of being imported into the live operational database.
A practical migration process is:
- Export the source data.
- Remove duplicates and obsolete records.
- Standardize names, dates, phone numbers and identifiers.
- Map each source field to a destination field.
- Import a small test sample.
- Verify totals and individual records.
- Correct mapping errors.
- Run the full import.
- Keep the original export safely archived.
Verification matters more than the import message saying “successful.” Ask departments to check a sample of real records. The accounts team should verify fee balances. The academic team should verify class and section allocation. HR should verify staff information.
For more detail on recognizing when an existing system is creating too much manual work, link this article to the eSchoolApp guide on signs your school has outgrown its ERP.
Days 19-24: Train Users by Role, Not by Feature
One large training session for everyone is usually ineffective.
Teachers do not need the same training as the accounts team. Parents do not need to understand administrator settings. Principals do not need to learn every data-entry screen.
Train each user group around its daily jobs.
Teachers: attendance, homework, marks, timetable and communication.
Accounts: fee setup, payment posting, reconciliation, receipts and outstanding reports.
Admissions: enquiries, applications, documents and conversion to student records.
Management: dashboards, reports, approvals and exceptions.
Parents: login, notifications, fees, attendance, homework and results.
Use real school examples during training. A teacher who completes a real attendance workflow will remember more than someone who watches twenty slides about “Attendance Module Features.”
Choose a few confident users as internal champions. They become the first line of help during the first weeks after launch.
Days 25-27: Run a Controlled Pilot
Before switching the entire school, run a small pilot with a limited class, department or workflow.
A good pilot exposes practical issues: missing permissions, confusing labels, incorrect message templates, devices that do not sync reliably, or steps users misunderstood during training.
Record issues in one shared tracker. Separate true software defects from configuration changes and training gaps. This prevents every user question from being treated as a product bug.
The pilot should end with a short go-live decision: what is ready, what needs a workaround, what must be fixed before launch, and what can wait until phase two.
Days 28-30: Go Live and Stabilize
Go-live day should be deliberately boring.
Do not launch three new modules, replace a payment gateway and change the school timetable on the same morning. Freeze avoidable changes and focus on the workflows already tested.
During the first days, keep a visible support channel. Monitor failed logins, payment exceptions, attendance completion, parent communication delivery and unresolved user questions.
Define when the old process will stop. Running paper, Excel and ERP permanently in parallel destroys confidence because nobody knows which record is final. A short fallback period is sensible; an endless duplicate process is not.
After the system is stable, schedule phase two rather than adding features randomly.
What Should You Measure After Go-Live?
A successful rollout is not measured by the number of modules enabled.
Measure outcomes such as:
- Percentage of teachers marking attendance in the ERP
- Percentage of online payments automatically posted to student accounts
- Number of manual spreadsheets retired
- Time required to produce monthly management reports
- Parent login or message-delivery success
- Number and type of support tickets
- Number of duplicate data-entry steps removed
These measures tell management whether the implementation is improving daily work.
How eSchoolApp Fits This Rollout Approach
eSchoolApp is designed around shared school records: admissions, student information, attendance, fees, examinations, communication, transport, staff and reporting can work from the same underlying data.
The eSchoolApp website states that technical setup can be completed quickly, but a school can still benefit from a structured 30-day organisational rollout for data verification, user training and adoption. Fast configuration and careful change management are not contradictory; they solve different parts of the project.
If you are still comparing products rather than implementing one, read the complete School ERP buying guide before starting this checklist.
Frequently Asked Questions
How long does school ERP implementation take?
The technical setup may be fast, while data cleanup, training and organisation-wide adoption can take longer. The right timeline depends on school size, data quality, modules and integrations.
Should every module go live together?
Usually no. Launch the workflows that solve the biggest operational problems first, stabilize them, then expand.
Who should lead a school ERP implementation?
A school-side project owner should coordinate with the vendor. The person needs enough authority to resolve process questions and enough operational knowledge to involve the right departments.
Should old data be migrated?
Migrate data that has operational, academic, financial or regulatory value. Historical information that is rarely needed may be retained in a secure archive instead of the live system.
How do we know the rollout succeeded?
Measure adoption, reduction in duplicate work, reporting speed, payment reconciliation, support issues and other outcomes defined before implementation.
Final Thoughts
School ERP implementation is less about installing software and more about redesigning how information moves through the school.
A clear 30-day plan gives teams enough structure to clean data, test workflows, train users and launch without turning the project into a term-long experiment.
Ready to plan your school ERP rollout? Book an eSchoolApp demo and bring your current workflows, data sources and integration requirements to the discussion.